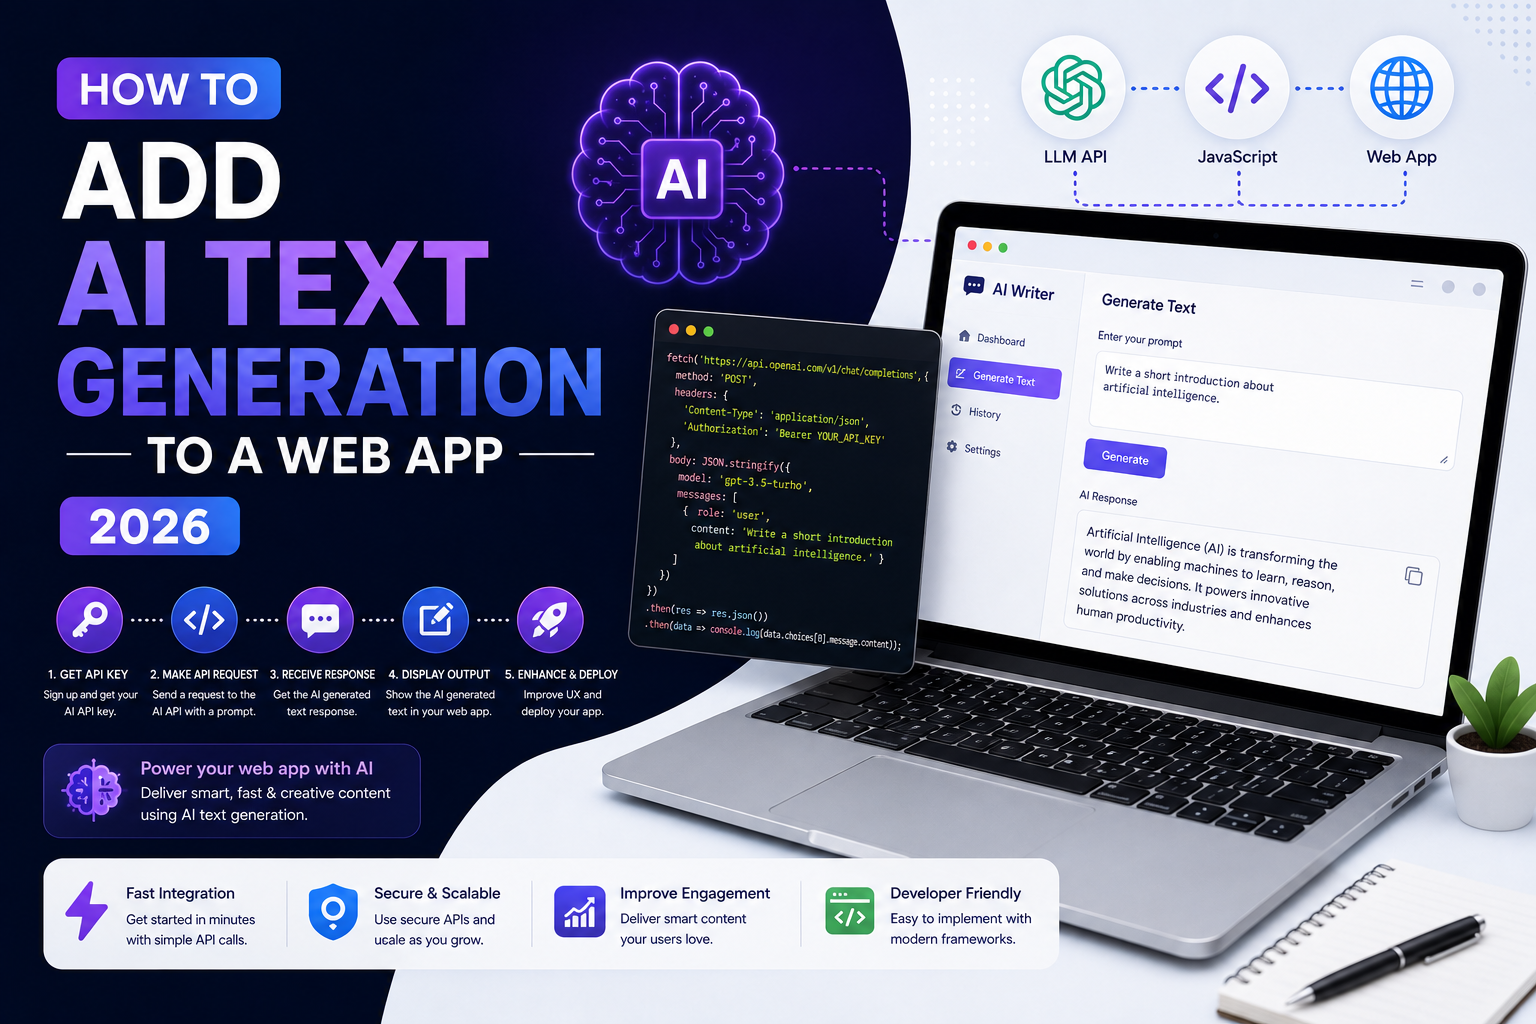
AI Text Generation is one of the most popular applications of artificial intelligence. It allows software applications to automatically generate human-like text based on a user’s instructions or input.
Today, AI text generation can be used for many different purposes, including writing product descriptions, creating blog ideas, generating emails, summarizing information, creating marketing copy, answering questions, and assisting users inside web applications.
In this tutorial, we will learn how to add AI Text Generation to a Web App using Python and an AI API.
This guide is designed for freshers, so we will start with the basic concepts before moving into the implementation. By the end of this tutorial, you will understand how a web application sends a user’s request to an AI model, receives generated text, and displays the result in the browser.
The overall architecture is simple:
User → Web App → Backend → AI API → AI Model → Generated Text → Web App
Once you understand this architecture, you can use the same approach to add AI Text Generation to many types of web applications.
What Is AI Text Generation?
AI Text Generation is the process of using an artificial intelligence model to create text from an input instruction, prompt, or context.
For example, a user might enter:
Write a short product description for a wireless headphone.
The AI model could generate:
Experience clear and immersive sound with these wireless headphones,
designed for comfortable everyday listening with a reliable wireless
connection and long-lasting battery life.
The generated response is created by the AI model based on the user’s input.
Unlike traditional applications that return predefined text, an application using AI Text Generation can generate different responses dynamically.
Why Add AI Text Generation to a Web App?
Adding AI Text Generation can make a web application more interactive and useful.
For example, an e-commerce website could use AI to generate product descriptions.
A marketing platform could generate social media captions.
A writing application could provide content suggestions.
A customer-support platform could help employees draft responses.
Some common applications include:
- Blog content generation
- Product descriptions
- Email generation
- Social media captions
- Marketing copy
- AI writing assistants
- Chatbots
- Customer-support responses
- Code generation
- Content rewriting
- Brainstorming tools
- Personalized recommendations
For freshers learning AI development, adding AI Text Generation to a web application is an excellent way to understand how modern AI products are built.
How Does AI Text Generation Work in a Web App?
Before writing code, let’s understand the architecture.
A typical AI Text Generation application contains several components.
1. Frontend
The frontend provides a text box where users enter their instructions.
2. Backend
The backend receives the user’s request and communicates with the AI service.
3. AI API
The backend sends the prompt to an AI API.
4. AI Model
The AI model processes the prompt and generates text.
5. Response
The generated text is returned to the backend.
6. Frontend Output
The frontend displays the generated response.
The workflow looks like this:
User
 ↓
Web Browser
 ↓
Frontend
 ↓
Backend API
 ↓
AI API
 ↓
AI Model
 ↓
Generated Text
 ↓
Backend
 ↓
Frontend
 ↓
User
This architecture is the foundation for adding AI Text Generation to a web application.
Technologies Required for AI Text Generation
There are several ways to build AI-powered applications.
For this tutorial, we will use:
Python
Python will handle the backend logic.
FastAPI
FastAPI provides a lightweight framework for creating our backend API.
AI API
We will connect the backend to an AI model through an API.
HTML, CSS, and JavaScript
These technologies will provide a simple frontend.
You can replace the frontend with React, Vue, Angular, Next.js, or another framework later.
The important concept is that the frontend should generally communicate with your backend rather than exposing your private AI API key in browser code.
Step 1: Create the Project
Create a new project folder:
mkdir ai-text-generation-web-app
cd ai-text-generation-web-app
A simple project structure can look like this:
ai-text-generation-web-app/
│
├── backend/
│   └── main.py
│
├── frontend/
│   ├── index.html
│   ├── style.css
│   └── script.js
│
└── .env
This structure separates the backend and frontend.
Step 2: Create a Python Virtual Environment
Create a virtual environment:
python -m venv venv
On Windows:
venv\Scripts\activate
On macOS or Linux:
source venv/bin/activate
Using a virtual environment is recommended because it keeps your project dependencies isolated.
Step 3: Install Required Libraries
Install FastAPI, Uvicorn, the AI SDK, and environment-variable support.
For example:
pip install fastapi uvicorn openai python-dotenv
The packages have different responsibilities:
fastapi— creates the backend API.uvicorn— runs the FastAPI server.openai— communicates with the OpenAI API.python-dotenv— loads environment variables from a.envfile.
For current OpenAI API usage, refer to the official OpenAI API documentation.
Step 4: Create an API Key
To use a hosted AI model, you need an API key from the provider you choose.
For OpenAI, API keys are managed through the OpenAI platform.
Create an environment file:
.env
Add:
OPENAI_API_KEY=your_api_key_here
Never put your API key directly inside frontend JavaScript.
For example, avoid:
const apiKey = "your-secret-key";
This is dangerous because users can inspect browser code and potentially obtain the key.
Instead:
Browser
   ↓
Your Backend
   ↓
AI API
The API key remains on the server.
Step 5: Create the FastAPI Backend
Create:
backend/main.py
Add:
import os

from dotenv import load_dotenv
from fastapi import FastAPI
from pydantic import BaseModel
from openai import OpenAI

load_dotenv()

app = FastAPI()

client = OpenAI(
    api_key=os.getenv("OPENAI_API_KEY")
)


class TextRequest(BaseModel):
    prompt: str


@app.post("/generate")
def generate_text(request: TextRequest):

    response = client.responses.create(
        model="gpt-5-mini",
        input=request.prompt
    )

    return {
        "text": response.output_text
    }
The exact model you choose should depend on your application’s requirements, cost, latency, and availability.
The OpenAI API documentation provides current information about models and the Responses API. OpenAI API documentation
Step 6: Understand the Backend Code
Let’s break down the code.
First, we load environment variables:
load_dotenv()
Then we create the FastAPI application:
app = FastAPI()
Next, the OpenAI client is initialized:
client = OpenAI(
    api_key=os.getenv("OPENAI_API_KEY")
)
The API key is read from the environment instead of being written directly into the source code.
Next, we define the request format:
class TextRequest(BaseModel):
    prompt: str
This means our API expects a JSON request containing a prompt.
For example:
{
  "prompt": "Write a short description of a coffee shop."
}
The /generate endpoint receives the request:
@app.post("/generate")
def generate_text(request: TextRequest):
Then the backend sends the prompt to the AI model:
response = client.responses.create(
    model="gpt-5-mini",
    input=request.prompt
)
Finally, the generated text is returned:
return {
    "text": response.output_text
}
This backend is the core connection between your web application and AI Text Generation.
Step 7: Run the Backend
From your project directory, run:
uvicorn backend.main:app --reload
The FastAPI application will start locally.
You can use the automatically generated API documentation to test your endpoint.
FastAPI provides interactive API documentation, which is especially useful for beginners.
Step 8: Create the Frontend
Now let’s create a simple frontend.
Create:
frontend/index.html
Add:
<!DOCTYPE html>
<html lang="en">

<head>
    <meta charset="UTF-8">
    <meta name="viewport" content="width=device-width, initial-scale=1.0">

    <title>AI Text Generation App</title>

    <link rel="stylesheet" href="style.css">
</head>

<body>

    <main class="container">

        <h1>AI Text Generation</h1>

        <p>
            Enter a prompt and generate AI-powered text.
        </p>

        <textarea
            id="prompt"
            placeholder="Write a product description for a smartphone..."
        ></textarea>

        <button id="generate">
            Generate Text
        </button>

        <div id="result"></div>

    </main>

    <script src="script.js"></script>

</body>

</html>
This creates a simple interface containing:
- Heading
- Description
- Text area
- Generate button
- Result area
Step 9: Add CSS
Create:
frontend/style.css
Add:
body {
    font-family: Arial, sans-serif;
    background: #f5f5f5;
    margin: 0;
}

.container {
    max-width: 800px;
    margin: 60px auto;
    padding: 30px;
    background: white;
    border-radius: 12px;
}

textarea {
    width: 100%;
    min-height: 180px;
    margin-top: 20px;
    padding: 15px;
    box-sizing: border-box;
}

button {
    margin-top: 15px;
    padding: 12px 20px;
    cursor: pointer;
}

#result {
    margin-top: 25px;
    white-space: pre-wrap;
}
This gives the application a basic clean interface.
Step 10: Connect the Frontend to the Backend
Create:
frontend/script.js
Add:
const button = document.getElementById("generate");

button.addEventListener("click", async () => {

    const prompt =
        document.getElementById("prompt").value;

    const result =
        document.getElementById("result");

    if (!prompt.trim()) {

        result.textContent =
            "Please enter a prompt.";

        return;
    }

    result.textContent =
        "Generating...";

    try {

        const response = await fetch(
            "http://127.0.0.1:8000/generate",
            {
                method: "POST",

                headers: {
                    "Content-Type": "application/json"
                },

                body: JSON.stringify({
                    prompt: prompt
                })
            }
        );

        const data = await response.json();

        result.textContent = data.text;

    } catch (error) {

        result.textContent =
            "Something went wrong.";
    }
});
Now the frontend can communicate with the FastAPI backend.
Understanding the Complete AI Text Generation Flow
Let’s say the user enters:
Write a short product description for a smartwatch.
The browser sends:
{
    "prompt": "Write a short product description for a smartwatch."
}
to:
POST /generate
The FastAPI backend receives the request.
The backend sends the prompt to the AI API.
The AI model generates a response.
The backend receives the response.
The backend sends the generated text back to the browser.
The browser displays it.
The complete workflow is:
User Prompt
     ↓
JavaScript
     ↓
FastAPI
     ↓
AI API
     ↓
AI Model
     ↓
Generated Text
     ↓
FastAPI
     ↓
JavaScript
     ↓
User
This is the fundamental architecture for adding AI Text Generation to a web application.
How to Write Better Prompts for AI Text Generation
The quality of generated text depends heavily on the instruction you provide to the model.
A simple prompt might be:
Write a product description.
A better prompt provides more context:
Write a 100-word product description for a premium wireless
headphone. Highlight battery life, comfort, sound quality,
and modern design. Use a professional marketing tone.
The second prompt gives the AI more information about:
- What to generate
- Length
- Product
- Features
- Tone
- Purpose
Good prompt design can significantly improve the usefulness of AI Text Generation.
Add a System Instruction
For more consistent results, your application can provide additional instructions to the model.
For example:
You are a professional marketing copywriter.
Write concise and engaging content.
Avoid exaggerated claims.
Then the user’s request can be:
Write a product description for wireless earbuds.
This approach separates the application’s behavior from the user’s input.
For production applications, you should carefully design these instructions and validate user-provided content.
Add Different AI Text Generation Modes
You can make the application more useful by providing different generation options.
For example:
Choose a task:

[ Blog Introduction ]
[ Product Description ]
[ Social Media Caption ]
[ Email ]
[ Ad Copy ]
When the user selects a task, your application can use a different instruction template.
For example:
prompts = {
    "Product Description":
        "Write a concise product description for: ",

    "Social Media Caption":
        "Write an engaging social media caption for: ",

    "Email":
        "Write a professional email about: "
}
This transforms a basic AI Text Generation application into a multi-purpose writing assistant.
Add Temperature and Generation Controls
AI models may provide controls that influence how responses are generated.
Depending on the API and model, generation parameters can affect creativity, randomness, output length, or other behavior.
For example, a creative content application may require more varied outputs, while a business application may prioritize consistent responses.
However, the exact controls available depend on the model and API being used.
Always check the provider’s current documentation before implementing model-specific parameters.
Add Streaming AI Text Generation
One useful improvement is streaming.
Without streaming:
User Prompt
    ↓
Wait
    ↓
Complete Response
    ↓
Display
With streaming:
User Prompt
    ↓
AI starts generating
    ↓
Word...
    ↓
Word...
    ↓
Word...
    ↓
Complete response
Streaming can make the application feel faster because users see the response while it is being generated.
This is particularly useful for chatbot and AI-writing interfaces.
Add Loading States
A good AI Text Generation web application should tell users when the model is processing their request.
For example:
Generating your content...
Instead of leaving the screen unchanged, show a loading indicator.
In JavaScript:
result.textContent = "Generating...";
After the response arrives:
result.textContent = data.text;
This improves the user experience.
Handle Errors Properly
AI applications depend on external services, so errors can happen.
Common problems include:
- Invalid API key
- Network failure
- API rate limits
- Invalid request
- Server errors
- Empty input
- Excessively large input
Your application should handle these errors gracefully.
For example:
@app.post("/generate")
def generate_text(request: TextRequest):

    try:

        response = client.responses.create(
            model="gpt-5-mini",
            input=request.prompt
        )

        return {
            "text": response.output_text
        }

    except Exception as error:

        return {
            "error": "Unable to generate text."
        }
For production applications, use structured exception handling and appropriate HTTP status codes instead of exposing internal error details to users.
Security Best Practices for AI Text Generation
Security is extremely important when adding AI Text Generation to a web application.
Never Expose API Keys
Do not put private API keys in frontend code.
Validate User Input
Do not blindly accept unlimited user input.
Add Authentication
If the application is private, require users to log in.
Add Rate Limits
Prevent a user from sending thousands of requests.
Protect Sensitive Data
Avoid unnecessarily sending private information to an external AI service.
Monitor Usage
Track API usage and unexpected request patterns.
Keep Secrets in Environment Variables
Use:
OPENAI_API_KEY=your_key
instead of hardcoding secrets.
These practices become increasingly important as your AI Text Generation application moves from a learning project to production.
Common Problems When Adding AI Text Generation
API Key Does Not Work
Check that your API key is correctly configured and available to the backend.
CORS Error
If your frontend and backend run on different origins, you may need to configure CORS on the backend.
Slow Responses
AI generation can take time depending on model, request size, network conditions, and service load.
Streaming can improve perceived responsiveness.
Generated Content Is Poor
Improve your prompts and provide more context.
High API Costs
Large prompts and frequent requests can increase usage.
Use appropriate models, limit input size, cache reusable results where appropriate, and monitor usage.
Model Does Not Follow Instructions
Improve the instruction structure and validate the output.
How to Improve Your AI Text Generation Web App
Once the basic application works, you can add advanced features.
1. User Authentication
Allow users to create accounts.
2. Generation History
Save previously generated content.
3. Copy Button
Add a button to copy the generated content.
4. Download Feature
Allow users to download generated text.
5. Multiple AI Models
Allow users to select between available models.
6. Streaming
Display generated content progressively.
7. Usage Tracking
Track how many generations each user performs.
8. Prompt Templates
Provide predefined templates for common tasks.
9. Database Integration
Store prompts and generated results.
10. React Frontend
Replace the HTML/JavaScript interface with React for a more advanced user experience.
Real-World Applications of AI Text Generation
There are many practical applications for AI Text Generation.
E-Commerce
Generate product descriptions automatically.
Digital Marketing
Create social media captions, email drafts, and marketing ideas.
Customer Support
Help agents draft responses.
Education
Generate study materials and explanations.
Content Creation
Generate article outlines, introductions, and drafts.
HR
Help create job descriptions and interview questions.
Software Development
Assist developers with documentation and code explanations.
Productivity
Help users write emails, notes, and other everyday content.
These use cases demonstrate why AI Text Generation has become an important capability for modern web applications.
AI Text Generation vs. Traditional Text Templates
Traditional applications usually use predefined templates.
For example:
Hello {name},

Thank you for contacting us about {product}.
The output is predictable.
With AI Text Generation, the application can generate dynamic content based on the context.
For example:
User:
Write a friendly response to a customer asking about delivery.

AI:
Hi! Thanks for reaching out. Your order is currently...
This flexibility is one of the main advantages of AI-powered applications.
However, traditional templates are still useful when exact wording is required.
A production system can combine both approaches.
How to Add AI Text Generation to a React Web App
If you already know React, the same architecture can be used.
The React application sends a request to your backend:
const response = await fetch(
    "http://localhost:8000/generate",
    {
        method: "POST",
        headers: {
            "Content-Type": "application/json"
        },
        body: JSON.stringify({
            prompt: userPrompt
        })
    }
);
The backend communicates with the AI service.
The response is then returned to React.
The architecture becomes:
React
  ↓
FastAPI / Node.js
  ↓
AI API
  ↓
AI Model
  ↓
Generated Text
  ↓
React
This is a common architecture for modern AI web applications.
Testing Your AI Text Generation Application
Before deployment, test different types of prompts.
Test 1: Simple Prompt
Write a short description of a laptop.
Test 2: Detailed Prompt
Write a professional 100-word product description
for a lightweight laptop designed for students.
Test 3: Empty Prompt
Verify that the application displays an appropriate warning.
Test 4: Very Long Prompt
Check whether the application handles large inputs correctly.
Test 5: Special Characters
Test emojis, symbols, and different types of text.
Test 6: Multiple Requests
Verify that the backend can handle repeated requests appropriately.
Testing helps identify problems before users encounter them.
Best Practices for AI Text Generation Applications
Follow these practices when building a production-ready application:
- Keep API keys on the server.
- Validate user input.
- Limit request sizes.
- Add authentication where necessary.
- Implement rate limiting.
- Handle API failures gracefully.
- Monitor API usage and costs.
- Store only the data you actually need.
- Test prompts with different inputs.
- Review AI-generated output for important use cases.
- Use appropriate models for your requirements.
- Keep your dependencies and API integration up to date.
An AI model should be treated as a component of the application rather than the entire application.
Frequently Asked Questions About AI Text Generation
What is AI Text Generation?
AI Text Generation is the process of using an AI model to generate text based on an input prompt, instructions, or context.
Can beginners add AI Text Generation to a web app?
Yes. Beginners can create a basic AI-powered web application using a frontend, a Python or JavaScript backend, and an AI API.
Do I need to train my own AI model?
No. You can use an existing AI model through an API. Training your own model is a much more advanced task.
Should the API key be placed in JavaScript?
No. A private API key should not be exposed in browser-side JavaScript. Keep it on your backend.
Can I use React?
Yes. React can be used as the frontend while FastAPI, Node.js, or another backend communicates with the AI service.
Can AI Text Generation be used for chatbots?
Yes. A chatbot can use AI Text Generation to produce responses based on user messages and conversation context.
Can I save generated content?
Yes. You can store prompts and generated responses in a database, provided you follow appropriate privacy and data-handling practices.
Is AI-generated content always accurate?
No. AI-generated text can contain incorrect or misleading information. Important outputs should be reviewed and validated.
Can I deploy the application online?
Yes. You can deploy the frontend and backend to suitable hosting platforms and configure your production API credentials securely.
Useful Resources for Learning
For current information about OpenAI APIs, models, authentication, and API usage, refer to the official OpenAI API documentation.
You can also explore the official OpenAI developer platform to learn more about building applications with OpenAI models.
For related AI development tutorials, continue learning with:
- How to Build an AI Text Classification App
- How to Build an AI-Powered Content Summarizer
- How to Create Embeddings With an LLM
- How to Store Embeddings in a Vector Database
- How to Create a Semantic Search Feature With Embeddings
- How to Build a Simple RAG Application With Python
- How to Build a Document Q&A App With Python
These internal resources provide a useful learning path from basic AI text generation to embeddings, semantic search, RAG, and document-based AI applications.
Conclusion
Adding AI Text Generation to a Web App is an excellent project for freshers who want to learn how modern AI applications communicate with language models.
In this tutorial, we learned what AI Text Generation is, how it works, how to create a Python backend with FastAPI, how to connect the backend to an AI API, and how to build a simple HTML, CSS, and JavaScript frontend.
The basic architecture can be summarized as:
User → Frontend → Backend → AI API → AI Model → Generated Text → Frontend
The most important concept is that your frontend should not directly expose private API credentials. The backend acts as the secure layer between your web application and the AI service.
Once the basic application works, you can add advanced capabilities such as streaming responses, authentication, databases, prompt templates, generation history, PDF exports, usage tracking, multiple models, and a React frontend.
You can also combine AI Text Generation with other AI technologies. For example, embeddings and vector databases can provide relevant information to the model, while RAG can help applications generate answers based on specific documents or knowledge sources.
For beginners, the recommended learning path is:
HTML/CSS/JavaScript → Python → APIs → FastAPI → AI APIs → AI Text Generation → RAG → Production AI Applications
By completing this project, you gain practical experience with frontend development, backend APIs, authentication concepts, API security, prompt design, and modern AI integration.
An AI Text Generation feature can therefore be more than a simple demo. With proper architecture, security, testing, and monitoring, it can become an important feature inside real-world content, productivity, marketing, customer-support, education, and business applications.