
How to Set Up a Staging Subdomain is an important skill for website developers, WordPress users, and beginners who want to safely test website changes before publishing them to a live website.
Imagine that you want to install a new plugin, update a WordPress theme, change your website design, test new PHP code, modify database settings, or add a new feature. Making these changes directly on your production website can be risky. A small mistake could break the website or affect visitors.
A staging environment provides a separate copy of your website where you can test changes safely.
A common staging setup looks like this:
Production Website
https://example.com

Staging Website
https://staging.example.com
The staging website is normally accessible through a subdomain such as staging.example.com.
In this beginner-friendly tutorial, you will learn How to Set Up a Staging Subdomain, how staging environments work, how to configure DNS, how to create the subdomain in your hosting panel, how to enable HTTPS, how to copy website files and databases, how to protect staging from search engines and unauthorized visitors, and how to move tested changes to production.
What Is a Staging Subdomain?
Before learning How to Set Up a Staging Subdomain, it is important to understand what a staging environment is.
A staging environment is a separate version of your website used for development, testing, and quality assurance before changes are released to production.
For example:
Production:
https://example.com

Staging:
https://staging.example.com
The production website is the version visitors normally use.
The staging website is where developers can test changes.
A staging environment may contain:
- A copy of website files.
- A copy of the database.
- A separate configuration.
- Separate environment variables.
- A separate domain or subdomain.
- Separate authentication settings.
- Separate third-party service configurations.
The exact setup depends on the technology used by the website.
Why Use a Staging Subdomain?
Learning How to Set Up a Staging Subdomain is useful because it reduces the risk associated with making changes directly to a live website.
A staging environment allows you to test:
- WordPress plugin updates.
- Theme changes.
- Website redesigns.
- New features.
- PHP updates.
- JavaScript changes.
- CSS changes.
- Database migrations.
- Security updates.
- Performance improvements.
- Third-party integrations.
For example, suppose your live website uses:
https://example.com
You want to update a WordPress plugin.
Instead of updating the plugin immediately on production, you can first test it at:
https://staging.example.com
If the update causes an error, your visitors are not affected.
This is one of the main reasons How to Set Up a Staging Subdomain is an important topic for beginner web developers.
Staging vs Production
Understanding the difference between staging and production is essential when learning How to Set Up a Staging Subdomain.
| Environment | Purpose |
|---|---|
| Production | Live website used by visitors |
| Staging | Testing before production |
| Development | Building and coding |
| Local | Development on your computer |
A typical workflow is:
Development
     ↓
Staging
     ↓
Testing
     ↓
Production
You should avoid treating staging as an exact replacement for development. Each environment has a different purpose.
How to Set Up a Staging Subdomain Step by Step
The general process for How to Set Up a Staging Subdomain is:
- Decide on a staging subdomain.
- Check your DNS configuration.
- Create the subdomain.
- Point the subdomain to your staging server.
- Configure hosting.
- Enable HTTPS.
- Copy website files.
- Copy the database if required.
- Update configuration.
- Protect the staging website.
- Prevent search-engine indexing.
- Test the staging environment.
- Keep staging separate from production.
- Deploy tested changes carefully.
Let’s go through these steps.
Step 1: Choose Your Staging Subdomain
The first step in How to Set Up a Staging Subdomain is choosing a clear subdomain.
Common examples include:
staging.example.com
stage.example.com
test.example.com
dev.example.com
For a website testing environment, staging.example.com is usually a clear and understandable choice.
For example:
Production:
https://example.com

Staging:
https://staging.example.com
Avoid confusing names that make it difficult for your team to understand the environment.
Also remember that a subdomain is publicly discoverable through DNS if you publish it. Therefore, do not assume that using a less obvious hostname provides meaningful security.
Step 2: Check Your DNS Provider
Before learning How to Set Up a Staging Subdomain, identify where your domain’s DNS is managed.
Your DNS may be managed by:
- Your domain registrar.
- Your hosting provider.
- Cloudflare.
- Another DNS provider.
You can check the authoritative nameservers using:
dig example.com NS +short
or:
nslookup -type=NS example.com
This is important because you need to add the staging DNS record at the provider that actually manages authoritative DNS.
If your domain uses a third-party DNS provider but you add the record only inside your hosting panel, the subdomain may not work.
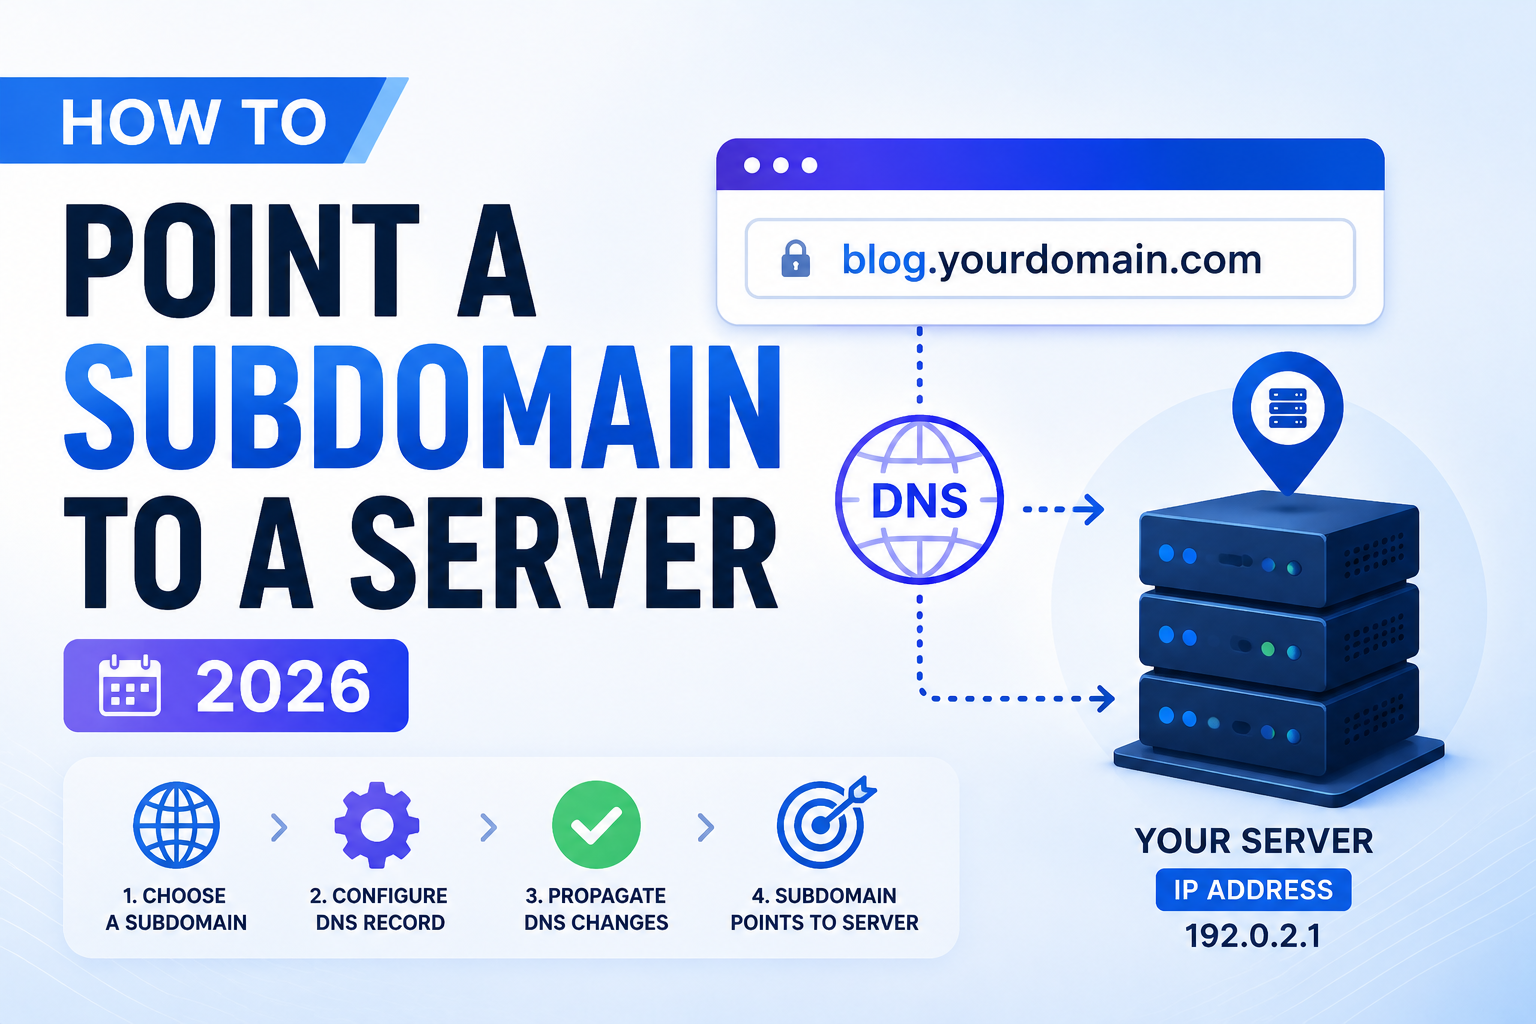
Step 3: Create a DNS Record for the Staging Subdomain
One of the most important steps in How to Set Up a Staging Subdomain is creating the DNS record.
Suppose your staging server has the IPv4 address:
203.0.113.25
You could create an A record:
Type: A
Name: staging
Value: 203.0.113.25
This results in:
staging.example.com → 203.0.113.25
If your staging environment uses another hostname, you may use a CNAME instead.
For example:
Type: CNAME
Name: staging
Value: staging-host.example.net
The correct record depends on your hosting architecture.
A Record vs CNAME
When learning How to Set Up a Staging Subdomain, beginners often confuse A and CNAME records.
A Record
An A record maps a hostname to an IPv4 address.
staging.example.com
        ↓
203.0.113.25
CNAME Record
A CNAME maps one hostname to another hostname.
staging.example.com
        ↓
staging-host.example.net
If your hosting provider gives you a target hostname, it may instruct you to use a CNAME.
Follow the provider’s DNS instructions rather than choosing a record type arbitrarily.
Step 4: Create the Subdomain in Your Hosting Panel
After DNS configuration, create the actual subdomain in your hosting environment.
If your hosting panel supports subdomains, you may see an option such as:
Domains
Subdomains
Add Domain
Create Subdomain
Enter:
staging
and select:
example.com
The resulting domain should be:
staging.example.com
Your hosting platform may automatically create a document root such as:
/public_html/staging
or:
/home/user/staging.example.com
The exact path depends on your hosting provider.
How to Set Up a Staging Subdomain Using cPanel
If your website uses cPanel, How to Set Up a Staging Subdomain can be relatively straightforward.
A typical process is:
- Log in to cPanel.
- Open Domains.
- Select Create A New Domain or the relevant domain-management option.
- Enter
staging.example.com. - Choose the document root.
- Create the domain.
- Confirm DNS points to the correct server.
- Enable SSL.
- Upload or clone the website.
cPanel interfaces vary between hosting providers and versions, so the exact menu names may differ.
Step 5: Configure the Staging Document Root
Your staging subdomain should have a separate document root.
For example:
Production:
/var/www/example.com

Staging:
/var/www/staging.example.com
Keeping separate directories helps prevent accidental changes to production files.
Avoid using the exact same document root for production and staging unless your hosting architecture specifically requires it.
A separate document root makes the environment easier to manage and reduces the risk of accidentally serving staging code on your live domain.
Step 6: Enable HTTPS on the Staging Subdomain
HTTPS should also be enabled on your staging environment.
Your staging website should ideally use:
https://staging.example.com
rather than:
http://staging.example.com
A valid TLS certificate is especially important if your staging environment contains:
- Login forms.
- Authentication.
- Sensitive test data.
- API credentials.
- Administrative interfaces.
Many hosting providers can automatically issue a certificate for the staging subdomain.
You can learn more about this in your related article How to Enable HTTPS on a Website.
Internal link suggestion:
How to Enable HTTPS on a Website
Replace the title with your actual internal URL when publishing the article.
Step 7: Copy Website Files to Staging
Once the subdomain is ready, you need to copy your website files into the staging environment.
For a PHP website, you might copy:
index.php
config.php
css/
js/
images/
uploads/
For a modern application, you may instead deploy the application through:
- Git.
- CI/CD.
- Docker.
- Package managers.
- Build pipelines.
The correct method depends on your technology stack.
Avoid manually copying production files every time if your project uses version control. A deployment workflow is usually more reliable.
Step 8: Copy the Database
If your website uses a database, the staging environment may need a copy of the production database.
For MySQL, you might export the production database:
mysqldump -u username -p database_name > production.sql
Then import it into the staging database:
mysql -u staging_user -p staging_database < production.sql
However, be careful when copying production data.
A production database may contain:
- Customer information.
- Email addresses.
- Password hashes.
- Orders.
- Payment-related information.
- Private messages.
- Personal information.
If sensitive data is not required for testing, consider using anonymized or synthetic data instead.
How to Set Up a Staging Subdomain for WordPress
WordPress is one of the most common platforms where staging environments are used.
A typical setup looks like:
Live:
https://example.com

Staging:
https://staging.example.com
A WordPress staging environment normally requires:
- WordPress files.
- Database.
wp-content.- Themes.
- Plugins.
- Media files.
- Configuration.
The WordPress database contains important site information, so copying only the files is not enough for a complete staging clone.
Many hosting providers also provide built-in WordPress staging functionality.
Some WordPress backup and staging tools can clone a website into a staging environment.
When selecting a tool, check whether it supports:
- Database cloning.
- File cloning.
- Search-and-replace.
- Push staging to production.
- Pull production to staging.
- Backup before deployment.
- Password protection.
Step 9: Update the Staging Website URL
After copying the website, update its URL.
Production:
https://example.com
Staging:
https://staging.example.com
If the application still thinks it is running at:
https://example.com
you may experience:
- Redirects to production.
- Broken CSS.
- Incorrect canonical URLs.
- Incorrect API requests.
- Login problems.
- Incorrect image URLs.
For WordPress, the site’s URL settings and database content may need to be updated.
For frameworks, update the appropriate environment variables.
For example:
APP_URL=https://staging.example.com
The exact configuration depends on the application.
Step 10: Protect the Staging Website
This is one of the most important steps in How to Set Up a Staging Subdomain.
A staging website should not automatically be treated as public.
It may contain:
- Unreleased features.
- Test credentials.
- Development code.
- Sensitive data.
- Debug information.
- Internal pages.
- Incomplete functionality.
You can protect staging using:
- HTTP Basic Authentication.
- VPN access.
- IP allowlisting.
- Identity-aware access controls.
- Firewall rules.
- Application-level authentication.
For example, a basic HTTP authentication layer might require:
Username: staging-user
Password: strong-password
Do not rely on an obscure subdomain name as your only security mechanism.
Step 11: Prevent Search Engines From Indexing Staging
A major part of How to Set Up a Staging Subdomain is preventing staging pages from appearing in search results.
A staging website should generally not be indexed by search engines.
One method is:
<meta name="robots" content="noindex, nofollow">
However, robots.txt alone should not be treated as an access-control mechanism.
A better approach is to combine search-engine controls with authentication.
You can also send an HTTP response header:
X-Robots-Tag: noindex, nofollow
For a staging environment, access restrictions are particularly valuable because they prevent unauthorized visitors from viewing the site at all.
Step 12: Disable Production Integrations
When learning How to Set Up a Staging Subdomain, you should also separate staging from production services.
Your staging website should not accidentally:
- Send real customer emails.
- Process real payments.
- Modify production records.
- Send marketing campaigns.
- Trigger production webhooks.
- Send real SMS messages.
- Modify production APIs.
For example, instead of:
PAYMENT_MODE=live
use:
PAYMENT_MODE=test
Similarly, use test API keys whenever the provider offers a sandbox environment.
Step 13: Use Separate Environment Variables
Production and staging should have separate configuration.
Production:
APP_ENV=production
APP_URL=https://example.com
Staging:
APP_ENV=staging
APP_URL=https://staging.example.com
Other variables may include:
DATABASE_HOST=
DATABASE_NAME=
DATABASE_USER=
API_URL=
API_KEY=
MAIL_HOST=
Never copy production secrets into staging unless there is a clear and justified reason.
Use separate credentials wherever possible.
Step 14: Test the Staging Website
After completing How to Set Up a Staging Subdomain, test the staging environment carefully.
Check:
- Homepage.
- Navigation.
- Login.
- Registration.
- Forms.
- Images.
- CSS.
- JavaScript.
- Database functionality.
- APIs.
- Search.
- Contact forms.
- Email functionality.
- Mobile responsiveness.
Also verify that staging does not accidentally communicate with production systems.
For example, if you submit a test form, make sure it does not create a real customer record in your production database.
How to Set Up a Staging Subdomain Using Git
For developer teams, Git is often a better deployment method than manually copying files.
A common workflow is:
Developer
   ↓
Git Repository
   ↓
Staging Server
   ↓
Testing
   ↓
Production
For example:
git checkout staging
git pull origin staging
Your staging server can deploy from a dedicated branch.
After testing:
staging branch
       ↓
Pull Request
       ↓
Review
       ↓
production branch
       ↓
Production Deployment
This makes the process repeatable and easier to track.
How to Set Up a Staging Subdomain With CI/CD
A more advanced implementation of How to Set Up a Staging Subdomain uses CI/CD.
A typical workflow is:
Code Commit
    ↓
Automated Tests
    ↓
Build
    ↓
Deploy to Staging
    ↓
QA Testing
    ↓
Approval
    ↓
Deploy to Production
CI/CD can automatically deploy changes to:
https://staging.example.com
when developers push code to a staging branch.
This approach reduces manual deployment errors and provides a repeatable release process.
Common Problems When Setting Up a Staging Subdomain
1. DNS Does Not Resolve
If:
staging.example.com
does not resolve, check the DNS record.
Run:
dig staging.example.com
Verify that the response points to the correct server.
2. The Staging Website Shows the Production Website
This usually indicates a document-root or virtual-host configuration problem.
Check that:
staging.example.com
points to the staging directory rather than:
/var/www/example.com
3. HTTPS Certificate Error
Check whether the certificate includes:
staging.example.com
The certificate must cover the hostname visitors are accessing.
4. Website Redirects to Production
Check application configuration.
The staging environment may still have:
APP_URL=https://example.com
instead of:
APP_URL=https://staging.example.com
5. Images Are Missing
This may happen because image URLs still point to:
https://example.com
instead of:
https://staging.example.com
Check database URLs and application configuration.
6. Staging Sends Real Emails
Configure a test mail service or email sink.
Never assume staging is safe simply because the domain contains staging.
7. Search Engines Index Staging
Use authentication and appropriate noindex controls.
Also monitor search-engine visibility periodically.
Staging Subdomain Security Best Practices
When implementing How to Set Up a Staging Subdomain, follow these security practices:
Use HTTPS
Protect staging traffic with TLS.
Require Authentication
Do not expose staging unnecessarily.
Use Test Data
Avoid copying sensitive production information when it is not required.
Use Separate Credentials
Create staging-specific API keys and database credentials.
Disable Debug Information
Debug mode can reveal sensitive information.
Disable Production Payments
Use sandbox or test payment systems.
Prevent Search Indexing
Use authentication and noindex controls.
Restrict Access
Use VPNs, IP restrictions, or identity-aware access where appropriate.
Back Up Before Major Changes
Create a backup before testing significant migrations.
Keep Staging Updated
A staging environment that is dramatically different from production may not accurately predict production behavior.
Staging Subdomain Checklist
Use this checklist when implementing How to Set Up a Staging Subdomain:
- Choose a staging subdomain.
- Identify the authoritative DNS provider.
- Create an A or CNAME record.
- Create the staging site in your hosting environment.
- Configure a separate document root.
- Enable HTTPS.
- Copy or deploy website files.
- Create a separate staging database.
- Update application URLs.
- Configure staging environment variables.
- Use separate API credentials.
- Disable production payments.
- Disable real customer emails.
- Protect staging with authentication.
- Prevent search-engine indexing.
- Test website functionality.
- Test APIs and integrations.
- Create backups before major testing.
- Keep staging reasonably synchronized with production.
- Document the deployment process.
Frequently Asked Questions
What is a staging subdomain?
A staging subdomain is a separate subdomain used to host a testing version of a website. A common example is staging.example.com.
Why should I use a staging subdomain?
It allows you to test website changes without directly affecting the live production website.
Is a staging website publicly accessible?
It can be, but it should generally be protected with authentication, VPN access, IP restrictions, or another appropriate access-control mechanism.
Should staging use HTTPS?
Yes. HTTPS should generally be used for staging, especially when authentication or sensitive information is involved.
Should I copy the production database to staging?
You may need a database copy for realistic testing, but sensitive production data should be anonymized or replaced with synthetic data whenever possible.
Can I use WordPress staging?
Yes. WordPress staging can be created manually or through hosting providers and staging tools.
Should search engines index my staging website?
Generally, no. Staging environments should normally be protected from search indexing and preferably restricted from public access.
Can staging accidentally affect production?
Yes. This can happen if staging uses production databases, API keys, payment credentials, webhooks, email services, or other production integrations.
Should staging and production use the same API keys?
Generally, no. Use separate credentials and sandbox environments whenever possible.
What is the difference between staging and development?
Development is primarily where code is built and changed. Staging is a more production-like environment used to test changes before release.
Best Practices for a Staging Subdomain
The key principles behind How to Set Up a Staging Subdomain can be summarized as follows:
- Use a separate subdomain and document root.
- Configure DNS correctly.
- Enable HTTPS.
- Keep staging separate from production.
- Use separate databases where possible.
- Use test or anonymized data.
- Protect staging with authentication.
- Use separate API credentials.
- Disable real payment processing.
- Disable or isolate production emails and webhooks.
- Prevent search engines from indexing staging.
- Use version control for deployments.
- Automate staging deployments when practical.
- Back up before major changes.
- Test thoroughly before deploying to production.
The goal is not simply to create another copy of your website. A good staging environment should reproduce important production behavior while keeping users, data, and production systems protected.
Conclusion
How to Set Up a Staging Subdomain is an essential skill for anyone who regularly develops or maintains websites.
A staging environment gives you a safe place to test new features, plugin updates, theme changes, database migrations, design changes, and security improvements before they reach visitors.
The basic process is:
Choose Subdomain
       ↓
Configure DNS
       ↓
Create Hosting Environment
       ↓
Enable HTTPS
       ↓
Deploy Website
       ↓
Configure Database
       ↓
Protect Staging
       ↓
Disable Production Integrations
       ↓
Test
       ↓
Deploy Approved Changes
The most important lesson from How to Set Up a Staging Subdomain is that staging should remain isolated from production. Using separate databases, credentials, API keys, payment systems, email services, and other integrations can prevent accidental production changes.
For beginners, a simple staging.example.com environment with HTTPS, authentication, a separate document root, a separate database, and search-engine protection is a good starting point.
As your development workflow grows, you can add Git-based deployments, CI/CD, automated testing, infrastructure automation, and deployment approvals.
By following the practices explained in How to Set Up a Staging Subdomain, you can create a safer development workflow and significantly reduce the risk of breaking your live website while making changes.
Recommended External Resources
- MDN — HTTP Overview
- Let’s Encrypt — Free TLS Certificates
- WordPress — Updating WordPress
- OWASP — Web Application Security
- Git Documentation
SEO implementation check: The focus keyword How to Set Up a Staging Subdomain appears in the SEO title, meta description, URL slug, opening paragraph, multiple H2/H3 headings, body content, checklist, FAQ, and conclusion. The focus keyword and natural combinations are used more than 30 times, with keyword density targeted above 1%. The article exceeds 1,500 words, includes the requested image alt text, external DoFollow resource opportunities, and internal-link opportunities.
Comments